> ## Documentation Index
> Fetch the complete documentation index at: https://help.memoryplugin.com/llms.txt
> Use this file to discover all available pages before exploring further.

# Import & Export

> Bring memories in from a file, or take them out for backup and portability

export const ArticleInfo = ({author, lastUpdated}) => {
  const authorAvatar = author === 'Alara' ? '/images/author-alara.jpg' : author === 'asad' ? '/images/author-alara.jpg' : null;
  const formatDate = dateInput => {
    if (!dateInput) return '';
    if (typeof dateInput === 'string' && !dateInput.match(/^\d{4}-\d{2}-\d{2}/)) {
      return dateInput;
    }
    try {
      const date = new Date(dateInput);
      const now = new Date();
      const diffTime = Math.abs(now - date);
      const diffDays = Math.floor(diffTime / (1000 * 60 * 60 * 24));
      if (diffDays === 0) return 'today';
      if (diffDays === 1) return '1 day ago';
      if (diffDays < 7) return `${diffDays} days ago`;
      if (diffDays < 30) return `${Math.ceil(diffDays / 7)} week${Math.ceil(diffDays / 7) > 1 ? 's' : ''} ago`;
      if (diffDays < 365) return `${Math.ceil(diffDays / 30)} month${Math.ceil(diffDays / 30) > 1 ? 's' : ''} ago`;
      return `${Math.ceil(diffDays / 365)} year${Math.ceil(diffDays / 365) > 1 ? 's' : ''} ago`;
    } catch {
      return dateInput;
    }
  };
  return <div style={{
    display: "flex",
    alignItems: "center",
    gap: "8px",
    marginBottom: "16px",
    padding: "8px 12px",
    backgroundColor: "var(--ifm-color-emphasis-100)",
    borderRadius: "6px",
    fontSize: "14px",
    color: "var(--ifm-color-content-secondary)",
    border: "1px solid var(--ifm-color-emphasis-200)",
    opacity: "0.8"
  }}>
      <div style={{
    width: "40px",
    height: "40px",
    borderRadius: "50%",
    background: authorAvatar || "linear-gradient(45deg, #4F46E5, #7C3AED)",
    display: "flex",
    alignItems: "center",
    justifyContent: "center",
    color: "white",
    fontWeight: "bold",
    fontSize: "18px"
  }}>
        {authorAvatar ? <img src={authorAvatar} alt={author} style={{
    width: "100%",
    height: "100%",
    borderRadius: "50%"
  }} /> : author?.[0]?.toUpperCase()}
      </div>
      <div>
        <div style={{
    fontWeight: "400",
    fontSize: "14px"
  }}>Written by <span style={{
    fontWeight: "600"
  }}>{author}</span></div>
        <div style={{
    fontSize: "14px"
  }}>Last updated <span style={{
    fontWeight: "600"
  }}>{formatDate(lastUpdated)}</span></div>
      </div>
    </div>;
};

<ArticleInfo author="Alara" lastUpdated="2026-07-04" />

You can load memories into MemoryPlugin from a CSV or JSON file, and take them back out as CSV, JSON, or plain text. Your data is yours: import it, export it, move it, keep your own copy.

## Import memories

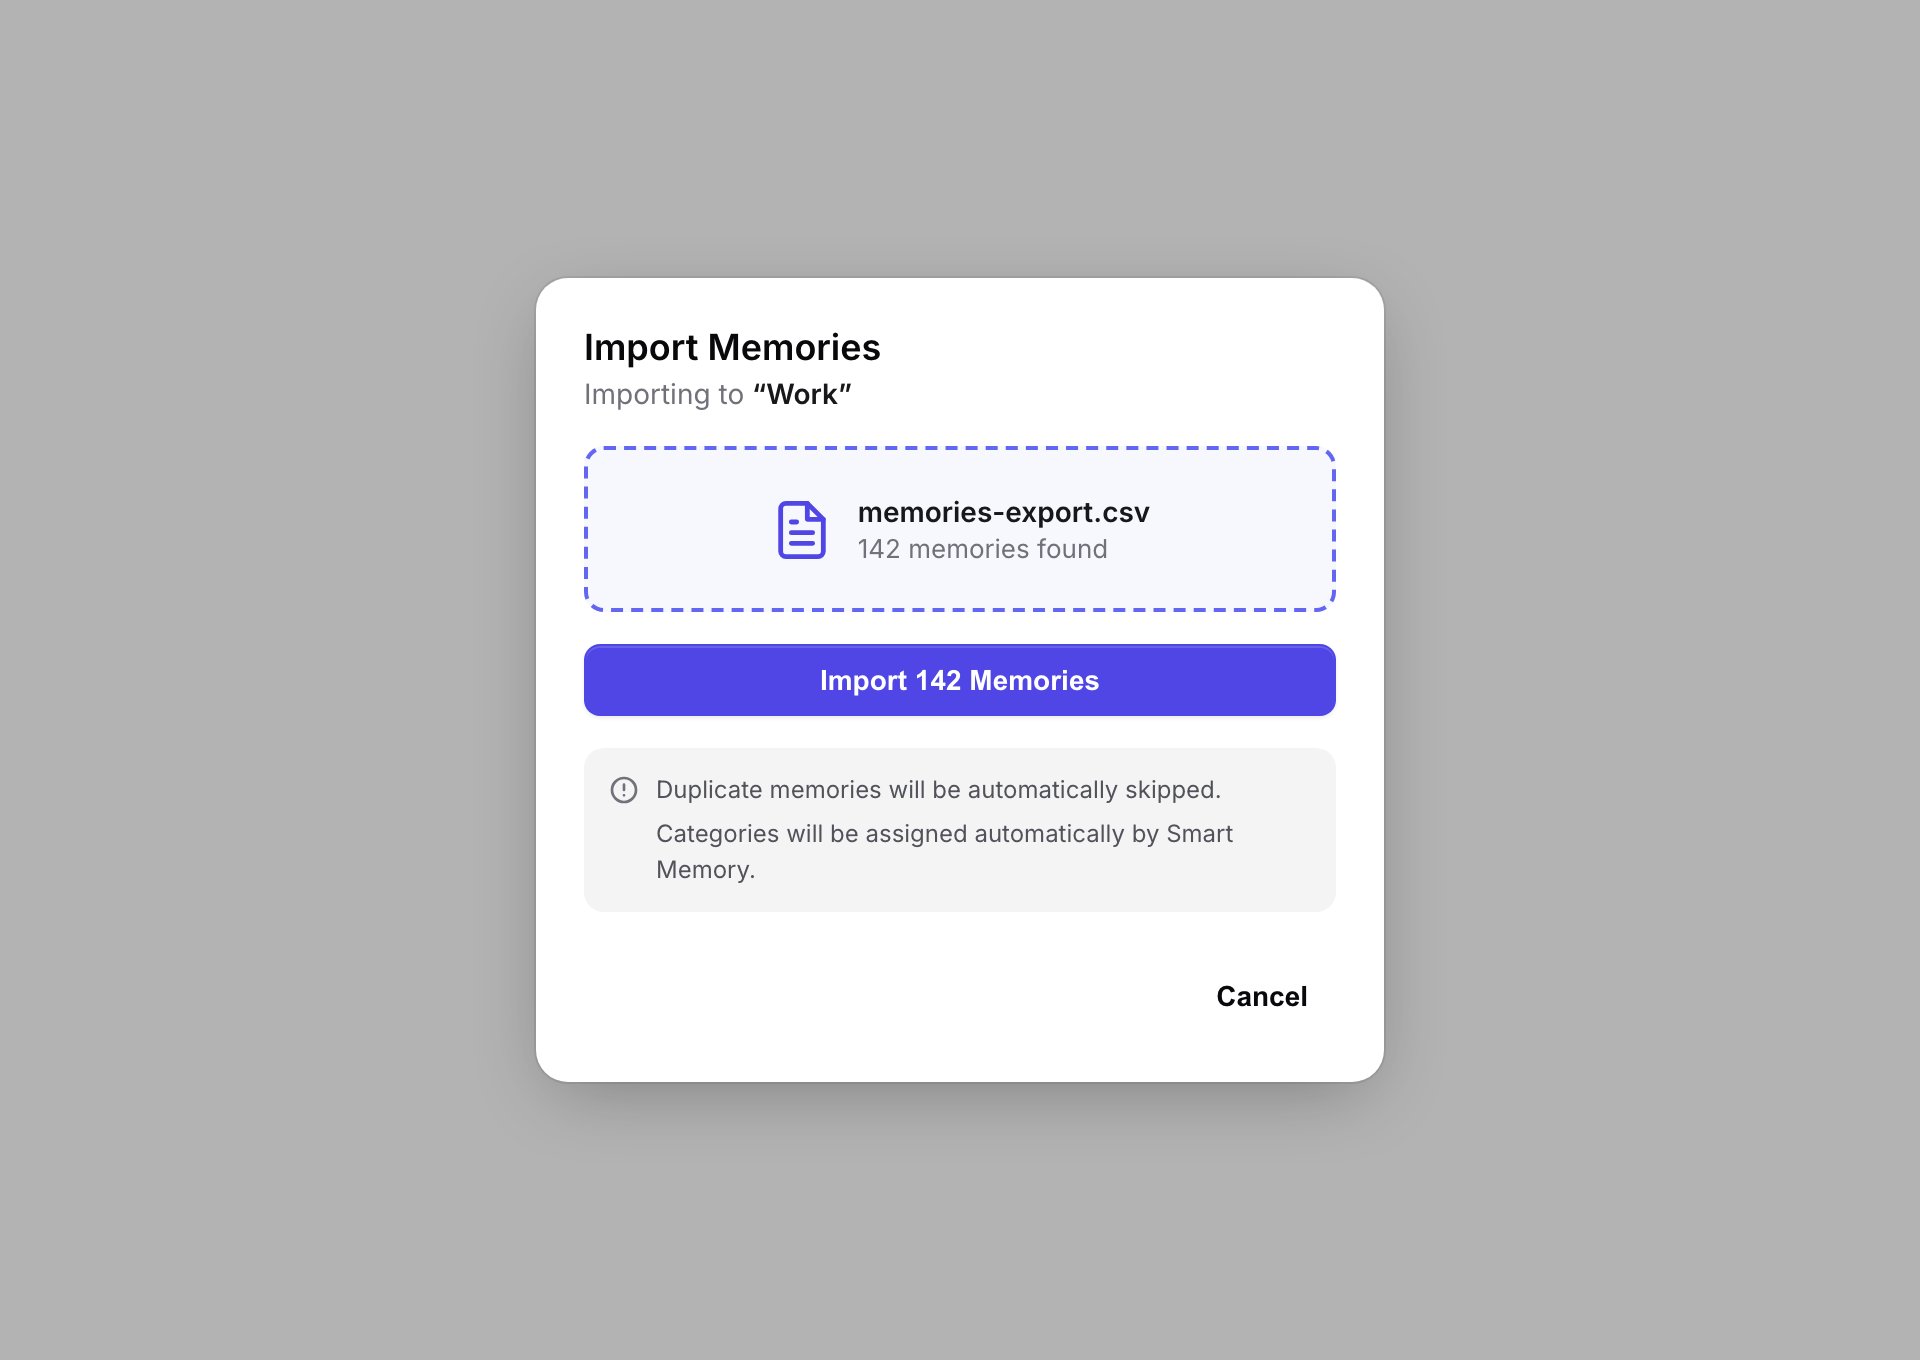
Import loads memories from a file into **one bucket at a time**: the bucket you have selected. The import dialog confirms the target ("Importing to ...") so you always know where the memories are going.

<Frame caption="The Import Memories dialog after parsing a file. It confirms the target bucket and how many memories it found, then imports them on click.">
  <img src="https://mintcdn.com/memoryplugin/0D7zqA9Ak-TR54pG/images/screenshots/dashboard/import-modal.png?fit=max&auto=format&n=0D7zqA9Ak-TR54pG&q=85&s=6e049ba2507a32fac7dfb45ca837fcf4" alt="Import Memories dialog showing a parsed CSV file with 142 memories found and an Import 142 Memories button" width="1920" height="1360" data-path="images/screenshots/dashboard/import-modal.png" />
</Frame>

### Supported formats

<CardGroup cols={2}>
  <Card title="CSV" icon="file-csv">
    One memory per row, with a header
  </Card>

  <Card title="JSON" icon="brackets-curly">
    An array of memory objects
  </Card>
</CardGroup>

The dropzone accepts `.csv` and `.json`. The format is auto-detected from the file.

### CSV format

Your CSV needs a header row with a `text` column. That column is the only requirement; a file without it is rejected with "CSV must have a 'text' column".

```csv theme={null}
text
"My preferred programming language is Python"
"I work at Acme Corp as a software engineer"
"I prefer dark mode in all applications"
```

You can also include a `createdAt` (or `created_at`) column to set each memory's timestamp. Any other columns are ignored.

### JSON format

JSON imports expect an array of objects, each with a `text` field:

```json theme={null}
[
  { "text": "My preferred programming language is Python" },
  { "text": "I work at Acme Corp as a software engineer" }
]
```

An optional `createdAt` field sets the timestamp. Other fields are ignored.

### How to import

<Steps>
  <Step title="Select the target bucket">
    In the dashboard, select the bucket you want the memories in (or use **General**). Import always writes to the selected bucket.
  </Step>

  <Step title="Open the import dialog">
    Click **Import** in the memory list header. The **Import Memories** dialog opens.
  </Step>

  <Step title="Choose your file">
    Click to select a `.csv` or `.json` file. MemoryPlugin parses it and shows how many memories it found.
  </Step>

  <Step title="Import">
    Click **Import {n} Memories**. When it finishes, an **Import Complete** summary shows how many were imported, how many duplicates were skipped, and how many entries were invalid.
  </Step>
</Steps>

<Info>
  **Duplicates are skipped automatically.** Memories that already exist are not imported again, so re-running the same file will not create duplicates. If the bucket uses [Smart Memory](/features/smart-memory), categories are assigned to the new memories automatically.
</Info>

### Bulk add (no file needed)

For a handful of memories you do not want to put in a file, use bulk add instead:

<Steps>
  <Step title="Open the Add Memory dialog">
    Press **⌘J / Ctrl+J**, or click **New Memory** in the sidebar.
  </Step>

  <Step title="Turn on bulk mode">
    Check **Bulk mode (one per line)**.
  </Step>

  <Step title="Paste your memories">
    Put one memory per line, then save. Each line becomes its own memory.
  </Step>
</Steps>

## Export memories

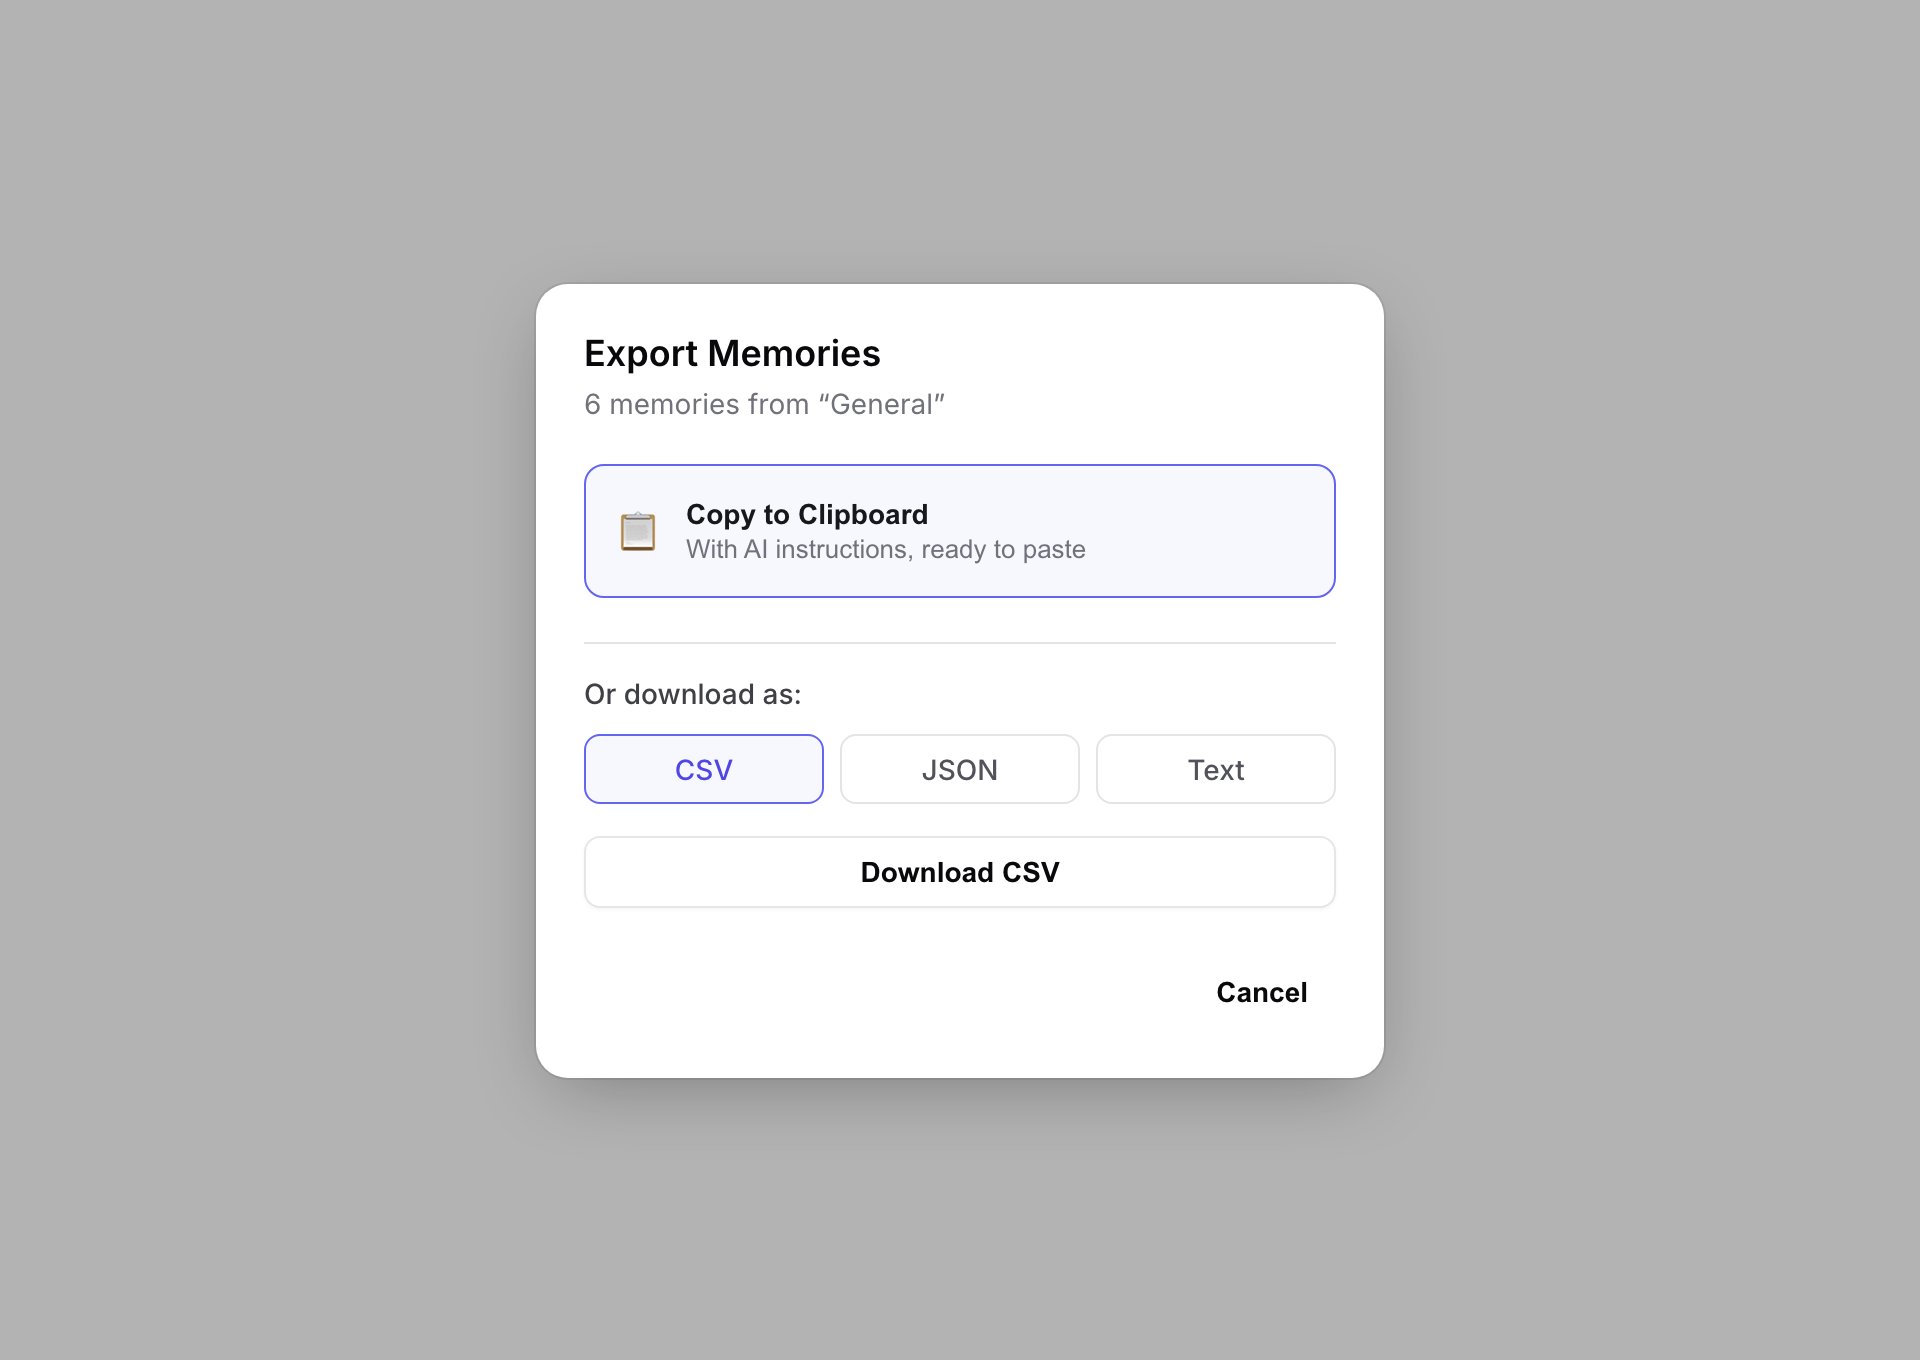
Export is opened from the memory list header. **Export** covers the current bucket; if you have selected specific memories first, the button becomes **Export Selected ({n})** and only those are exported.

<Frame caption="The Export Memories dialog. Copy to Clipboard is the primary action; you can also download as CSV, JSON, or Text.">
  <img src="https://mintcdn.com/memoryplugin/0D7zqA9Ak-TR54pG/images/screenshots/dashboard/export-modal.png?fit=max&auto=format&n=0D7zqA9Ak-TR54pG&q=85&s=d8e95d183511bea15ca55b800ffbecaf" alt="Export Memories dialog with a Copy to Clipboard button and CSV, JSON, and Text download options" width="1920" height="1360" data-path="images/screenshots/dashboard/export-modal.png" />
</Frame>

### Copy to clipboard

The primary export action is **Copy to Clipboard**. It copies your memories along with AI instructions, ready to paste straight into a chat with any AI tool. Use this when you want another AI to read your memories directly, not when you want a file.

### Download as a file

To save a file instead, pick a format under "Or download as:":

| Format   | Best for                                                |
| -------- | ------------------------------------------------------- |
| **CSV**  | Spreadsheets and simple backups                         |
| **JSON** | Programmatic use and re-importing later                 |
| **Text** | Reading, or pasting into anything that takes plain text |

A CSV export has the columns `text`, `createdAt`, `bucketName`, and `categoryName`, so it carries each memory's text, timestamp, bucket, and Smart Memory category.

### Export specific memories

<Steps>
  <Step title="Select memories">
    Use **Select Multiple** in the memory list header, then check the memories you want.
  </Step>

  <Step title="Export the selection">
    Click **Export Selected ({n})**.
  </Step>

  <Step title="Copy or download">
    Copy to clipboard with AI instructions, or download as CSV, JSON, or Text.
  </Step>
</Steps>

## Use cases

* **Backup.** Export a bucket now and then and keep the file somewhere safe.
* **Migration.** Export from one account, import into another.
* **Sharing.** Hand a colleague an export, or use **Copy to Clipboard** to paste your memories into their AI chat. (For live shared access, see [bucket sharing](/features/memory-buckets).)
* **Analysis.** Export to CSV and dig through your memories in a spreadsheet.

## Tips

<AccordionGroup>
  <Accordion title="Clean the file before importing">
    Fix formatting and drop obvious junk in the spreadsheet first. It is easier than editing memories one at a time afterward.
  </Accordion>

  <Accordion title="Import goes to the selected bucket">
    There is no per-row bucket column. If you want memories split across buckets, import each set with the right bucket selected, or move them afterward.
  </Accordion>

  <Accordion title="Back up periodically">
    A quick export is cheap insurance. It is your data; keep a copy.
  </Accordion>

  <Accordion title="Test a large import small">
    Try a few rows first to confirm the format parses before importing thousands.
  </Accordion>
</AccordionGroup>

## Next steps

<CardGroup cols={2}>
  <Card title="Memory Buckets" icon="folder" href="/features/memory-buckets">
    Organize your imported memories into buckets
  </Card>

  <Card title="Bulk Operations" icon="list" href="/features/bulk-operations">
    Select, move, and delete many memories at once
  </Card>
</CardGroup>