> ## Documentation Index
> Fetch the complete documentation index at: https://help.memoryplugin.com/llms.txt
> Use this file to discover all available pages before exploring further.

# ChatGPT

> Using MemoryPlugin with ChatGPT

export const ArticleInfo = ({author, lastUpdated}) => {
  const authorAvatar = author === 'Alara' ? '/images/author-alara.jpg' : author === 'asad' ? '/images/author-alara.jpg' : null;
  const formatDate = dateInput => {
    if (!dateInput) return '';
    if (typeof dateInput === 'string' && !dateInput.match(/^\d{4}-\d{2}-\d{2}/)) {
      return dateInput;
    }
    try {
      const date = new Date(dateInput);
      const now = new Date();
      const diffTime = Math.abs(now - date);
      const diffDays = Math.floor(diffTime / (1000 * 60 * 60 * 24));
      if (diffDays === 0) return 'today';
      if (diffDays === 1) return '1 day ago';
      if (diffDays < 7) return `${diffDays} days ago`;
      if (diffDays < 30) return `${Math.ceil(diffDays / 7)} week${Math.ceil(diffDays / 7) > 1 ? 's' : ''} ago`;
      if (diffDays < 365) return `${Math.ceil(diffDays / 30)} month${Math.ceil(diffDays / 30) > 1 ? 's' : ''} ago`;
      return `${Math.ceil(diffDays / 365)} year${Math.ceil(diffDays / 365) > 1 ? 's' : ''} ago`;
    } catch {
      return dateInput;
    }
  };
  return <div style={{
    display: "flex",
    alignItems: "center",
    gap: "8px",
    marginBottom: "16px",
    padding: "8px 12px",
    backgroundColor: "var(--ifm-color-emphasis-100)",
    borderRadius: "6px",
    fontSize: "14px",
    color: "var(--ifm-color-content-secondary)",
    border: "1px solid var(--ifm-color-emphasis-200)",
    opacity: "0.8"
  }}>
      <div style={{
    width: "40px",
    height: "40px",
    borderRadius: "50%",
    background: authorAvatar || "linear-gradient(45deg, #4F46E5, #7C3AED)",
    display: "flex",
    alignItems: "center",
    justifyContent: "center",
    color: "white",
    fontWeight: "bold",
    fontSize: "18px"
  }}>
        {authorAvatar ? <img src={authorAvatar} alt={author} style={{
    width: "100%",
    height: "100%",
    borderRadius: "50%"
  }} /> : author?.[0]?.toUpperCase()}
      </div>
      <div>
        <div style={{
    fontWeight: "400",
    fontSize: "14px"
  }}>Written by <span style={{
    fontWeight: "600"
  }}>{author}</span></div>
        <div style={{
    fontSize: "14px"
  }}>Last updated <span style={{
    fontWeight: "600"
  }}>{formatDate(lastUpdated)}</span></div>
      </div>
    </div>;
};

<ArticleInfo author="Alara" lastUpdated="2026-07-04" />

<img src="https://mintcdn.com/memoryplugin/0D7zqA9Ak-TR54pG/images/logos/chatgpt.svg?fit=max&auto=format&n=0D7zqA9Ak-TR54pG&q=85&s=b9e857aa4a54df1a89a1e7f5b305c6e0" alt="ChatGPT" width="56" height="56" noZoom style={{ background: "#fff", borderRadius: "14px", padding: "10px", boxShadow: "0 1px 2px rgba(0,0,0,0.12)", boxSizing: "border-box" }} data-path="images/logos/chatgpt.svg" />

ChatGPT is OpenAI's assistant at [chatgpt.com](https://chatgpt.com). MemoryPlugin gives it long-term memory that carries across your other AI tools, and lets you sync and search your ChatGPT chat history.

## Set up

The browser extension is the recommended route. It works on the ChatGPT web app in any Chromium browser or Safari.
<Steps>
  <Step title="Install the extension">
    Install the [browser extension](/integrations/browser-extension) and sign in to your MemoryPlugin account.
  </Step>

  <Step title="Open ChatGPT">
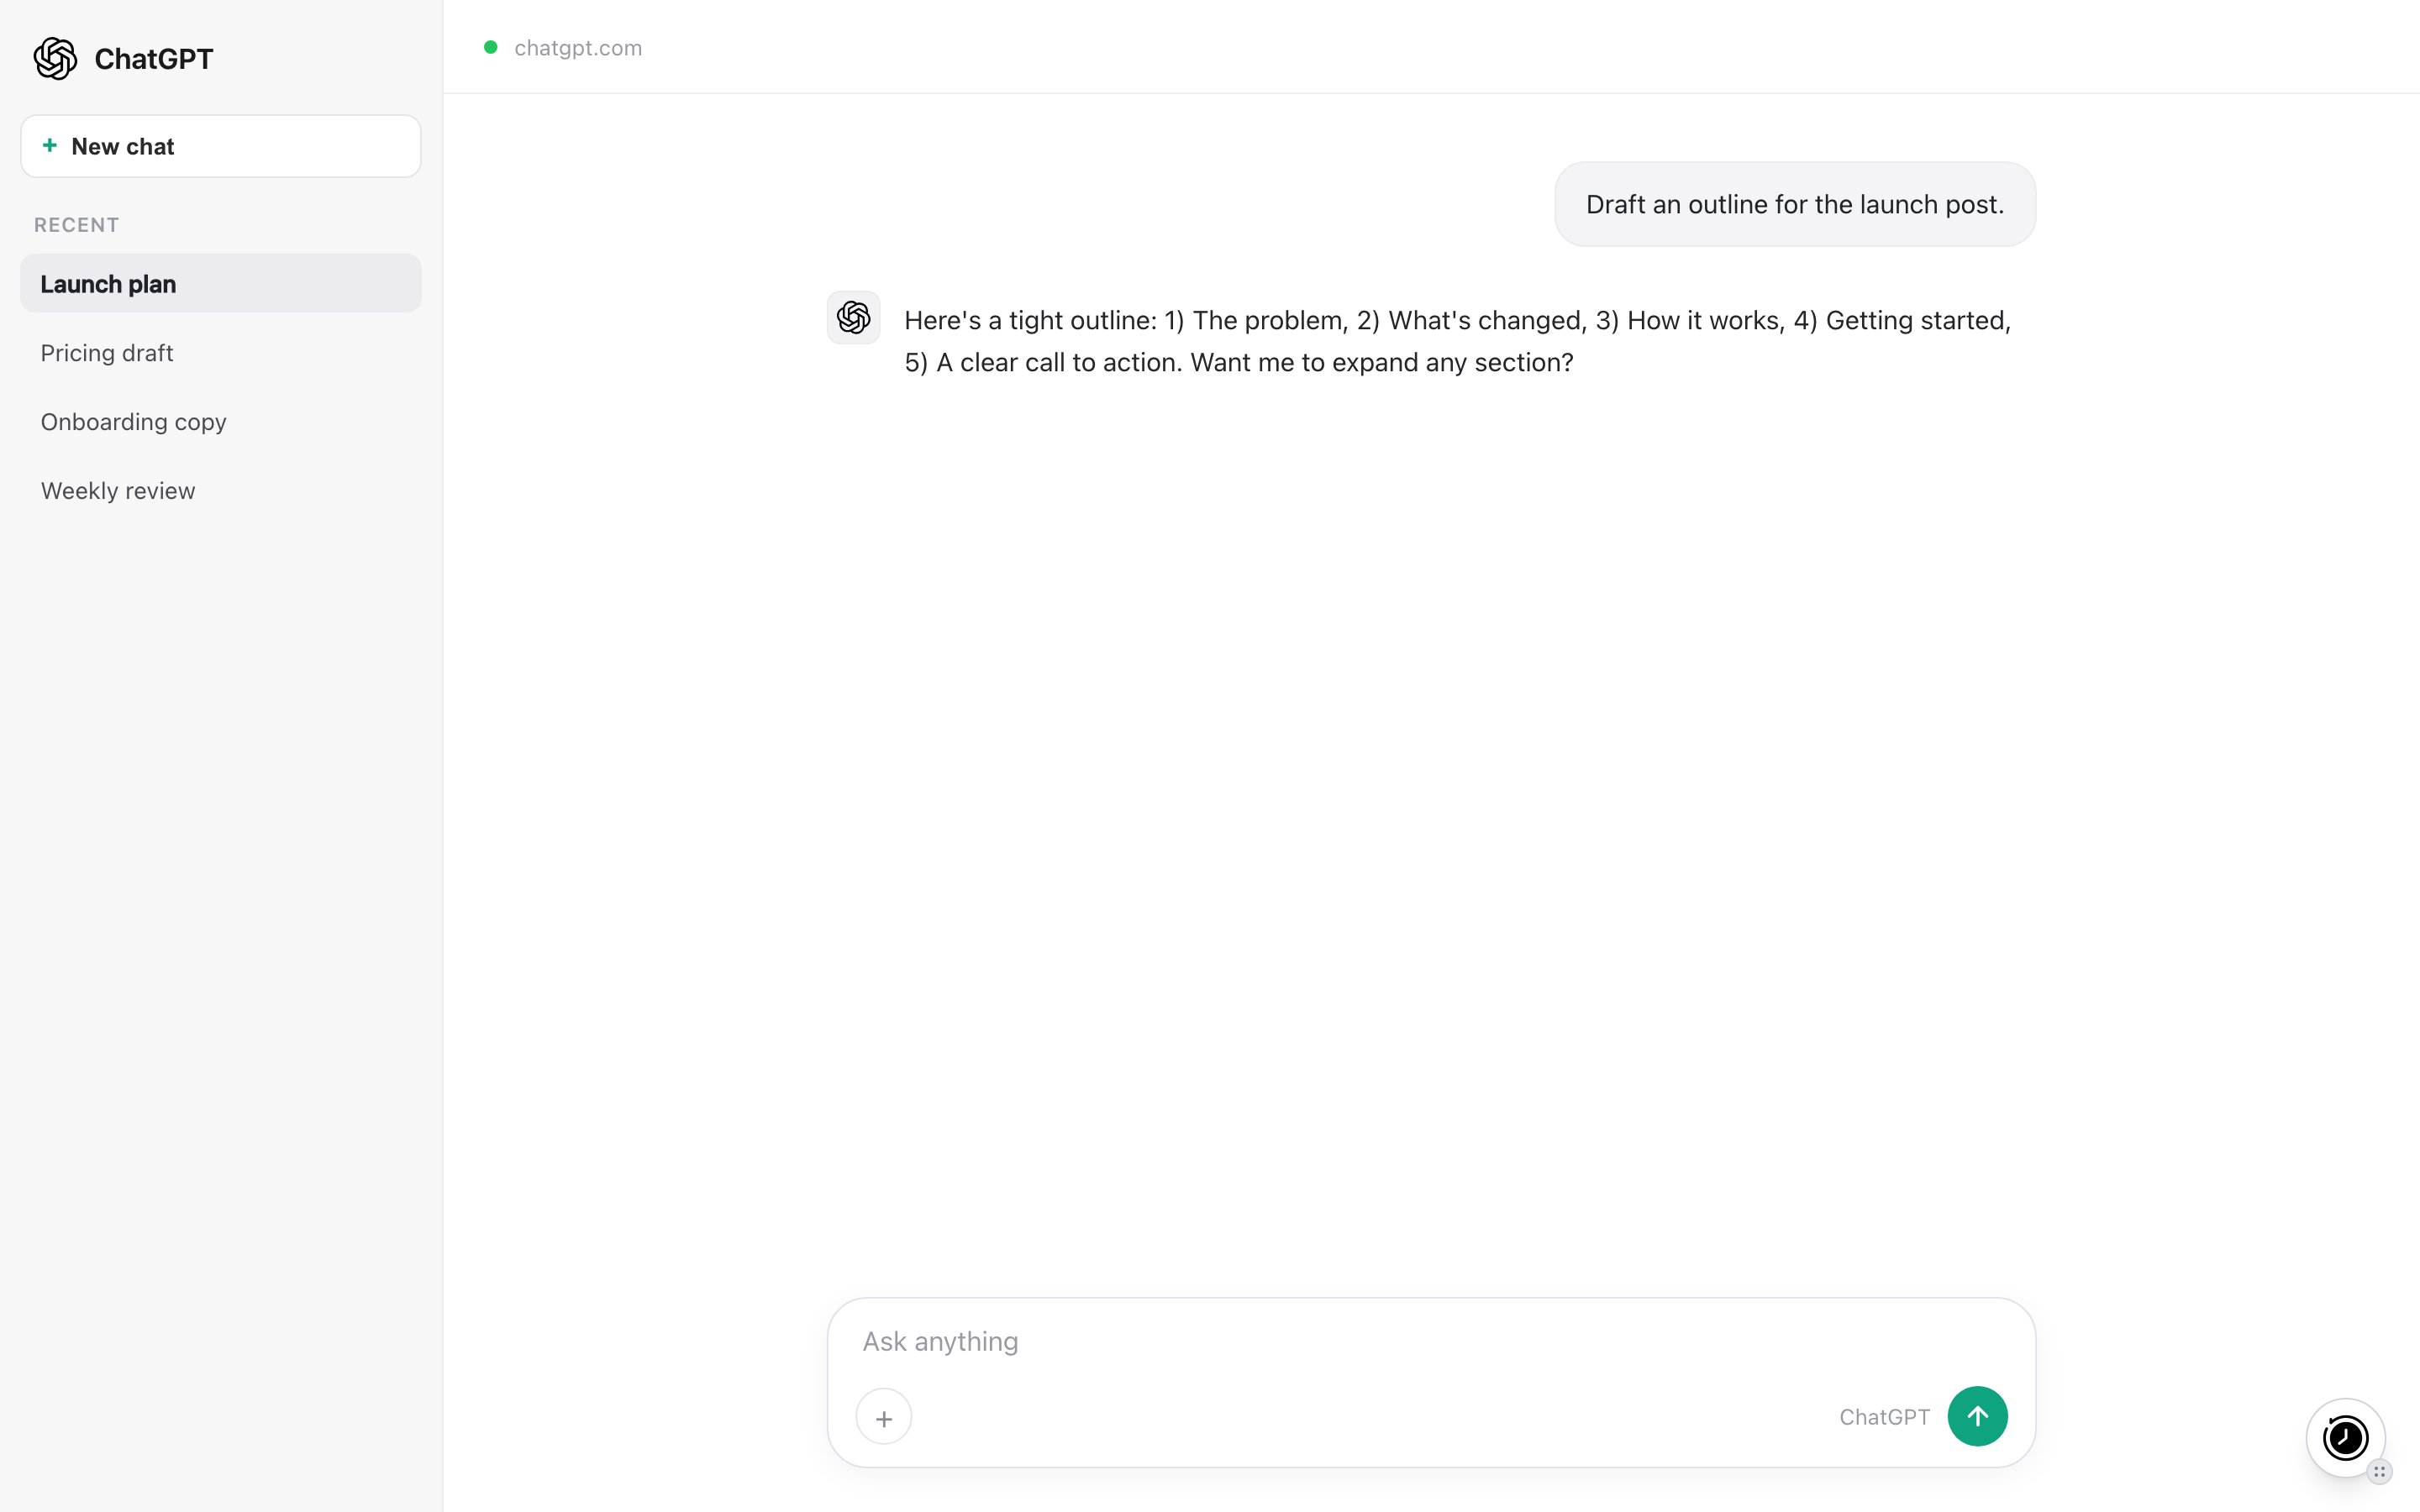
    Go to [chatgpt.com](https://chatgpt.com). A floating MemoryPlugin button appears on the page.
  </Step>

  <Step title="Activate for the chat">
    Click the button to inject memories from your selected bucket into the composer, then send your message. This also tells ChatGPT how to save new memories as you talk.
  </Step>
</Steps>

<Frame caption="The MemoryPlugin floating button on chatgpt.com. Click it to inject memories or open the panel.">
  <img src="https://mintcdn.com/memoryplugin/9o9T_0PzzkacB3w3/images/screenshots/platforms/chatgpt.png?fit=max&auto=format&n=9o9T_0PzzkacB3w3&q=85&s=e5518387ae773ed25ec8d9a2e6252c3a" alt="MemoryPlugin floating button on ChatGPT (chatgpt.com)" width="2880" height="1800" data-path="images/screenshots/platforms/chatgpt.png" />
</Frame>

### Custom GPT (alternative)

The [MemoryPlugin Custom GPT](https://chatgpt.com/g/g-pPRwrR7LI-memoryplugin) loads your memories automatically, with no extension. It works on the ChatGPT web app and mobile app. To add memory to a GPT you build yourself, follow the [Custom GPT Integration](/integrations/custom-gpt-integration) guide.

## What works here

This walkthrough covers both routes: the official Custom GPT (memory travels through GPT actions) and the browser extension on chatgpt.com (injection, auto-inject, AI-driven recall, and chat history sync).

<video controls playsInline className="w-full aspect-video rounded-xl" src="https://mintcdn.com/memoryplugin/9o9T_0PzzkacB3w3/videos/using-with-chatgpt.mp4?fit=max&auto=format&n=9o9T_0PzzkacB3w3&q=85&s=64c12c7360b12176ec24d6a2df0189c8" data-path="videos/using-with-chatgpt.mp4" />

* **Memory recall and save.** Injected memories give ChatGPT context; new memories are saved back as you talk.
* **Chat history sync.** ChatGPT is one of the six platforms the extension can sync directly. New conversations are captured for search and recall across your tools. You can also upload a ChatGPT export file instead.
* **Extract memory pill.** Select text in a chat and click **Extract memory** to save that snippet.
* **Import existing ChatGPT memories.** Transfer the memories ChatGPT already stores about you into MemoryPlugin.

### Import ChatGPT memories

<Steps>
  <Step title="Open memory management">
    In ChatGPT, go to Settings, then Personalization, then Manage memories.
  </Step>

  <Step title="Sync">
    Click the **Sync Memories** button marked with the MemoryPlugin logo.
  </Step>

  <Step title="Wait">
    Keep the tab open until the sync finishes. It runs in a few minutes and skips duplicates if you run it again.
  </Step>
</Steps>

## Limitations

* The extension does not inject on its own by default. You click the button to activate a chat, or turn on **Automatically add memories in new conversations** in the extension settings (it injects after a 5-second countdown you can cancel).
* ChatGPT splits large history exports into multiple files (`conversations-001.json`, `conversations-002.json`, and so on). Select all of them when you import.

## Next steps

<CardGroup cols={2}>
  <Card title="Browser Extension" icon="browser" href="/integrations/browser-extension">
    Full setup and features
  </Card>

  <Card title="Import ChatGPT Memories" icon="download" href="/features/chatgpt-memory-import">
    Transfer your existing memories
  </Card>

  <Card title="Custom GPT Integration" icon="robot" href="/integrations/custom-gpt-integration">
    Add memory to your own GPT
  </Card>

  <Card title="Chat History" icon="clock-rotate-left" href="/features/chat-history/introduction">
    Import and search your conversations
  </Card>
</CardGroup>
