

Browser Compatibility
- Chromium Browsers
- Safari
Works with all Chromium-based browsers:
- Chrome
- Arc
- Opera
- Microsoft Edge
- Vivaldi
- Brave
- Quetta Browser (Android)
- And other Chromium derivatives
Install the extension using the links below, or find them on your MemoryPlugin Dashboard after signing up.
Account email independence: Your MemoryPlugin sign‑in email does not need to match the email you use on ChatGPT, Claude, TypingMind, or any other tool. Access and permissions are tied to your MemoryPlugin account (and API key when applicable), not third‑party logins.
Installation
Chrome Web Store
Install for Chrome and Chromium-based browsers
Safari (TestFlight Beta)
Install for Safari on iOS and macOS
After installation, sign up or log in to your MemoryPlugin Dashboard to start using the extension.
The Panel
On a supported site you get a round MemoryPlugin button floating on the page. Drag it anywhere; the extension remembers its position per site. Above it sits an Add Memories pill (it reads Login when you are signed out). Click the button to open the panel. The header shows MemoryPlugin, your plan badge (CORE, PRO, or PRO LT), a dark-mode toggle, and a close button.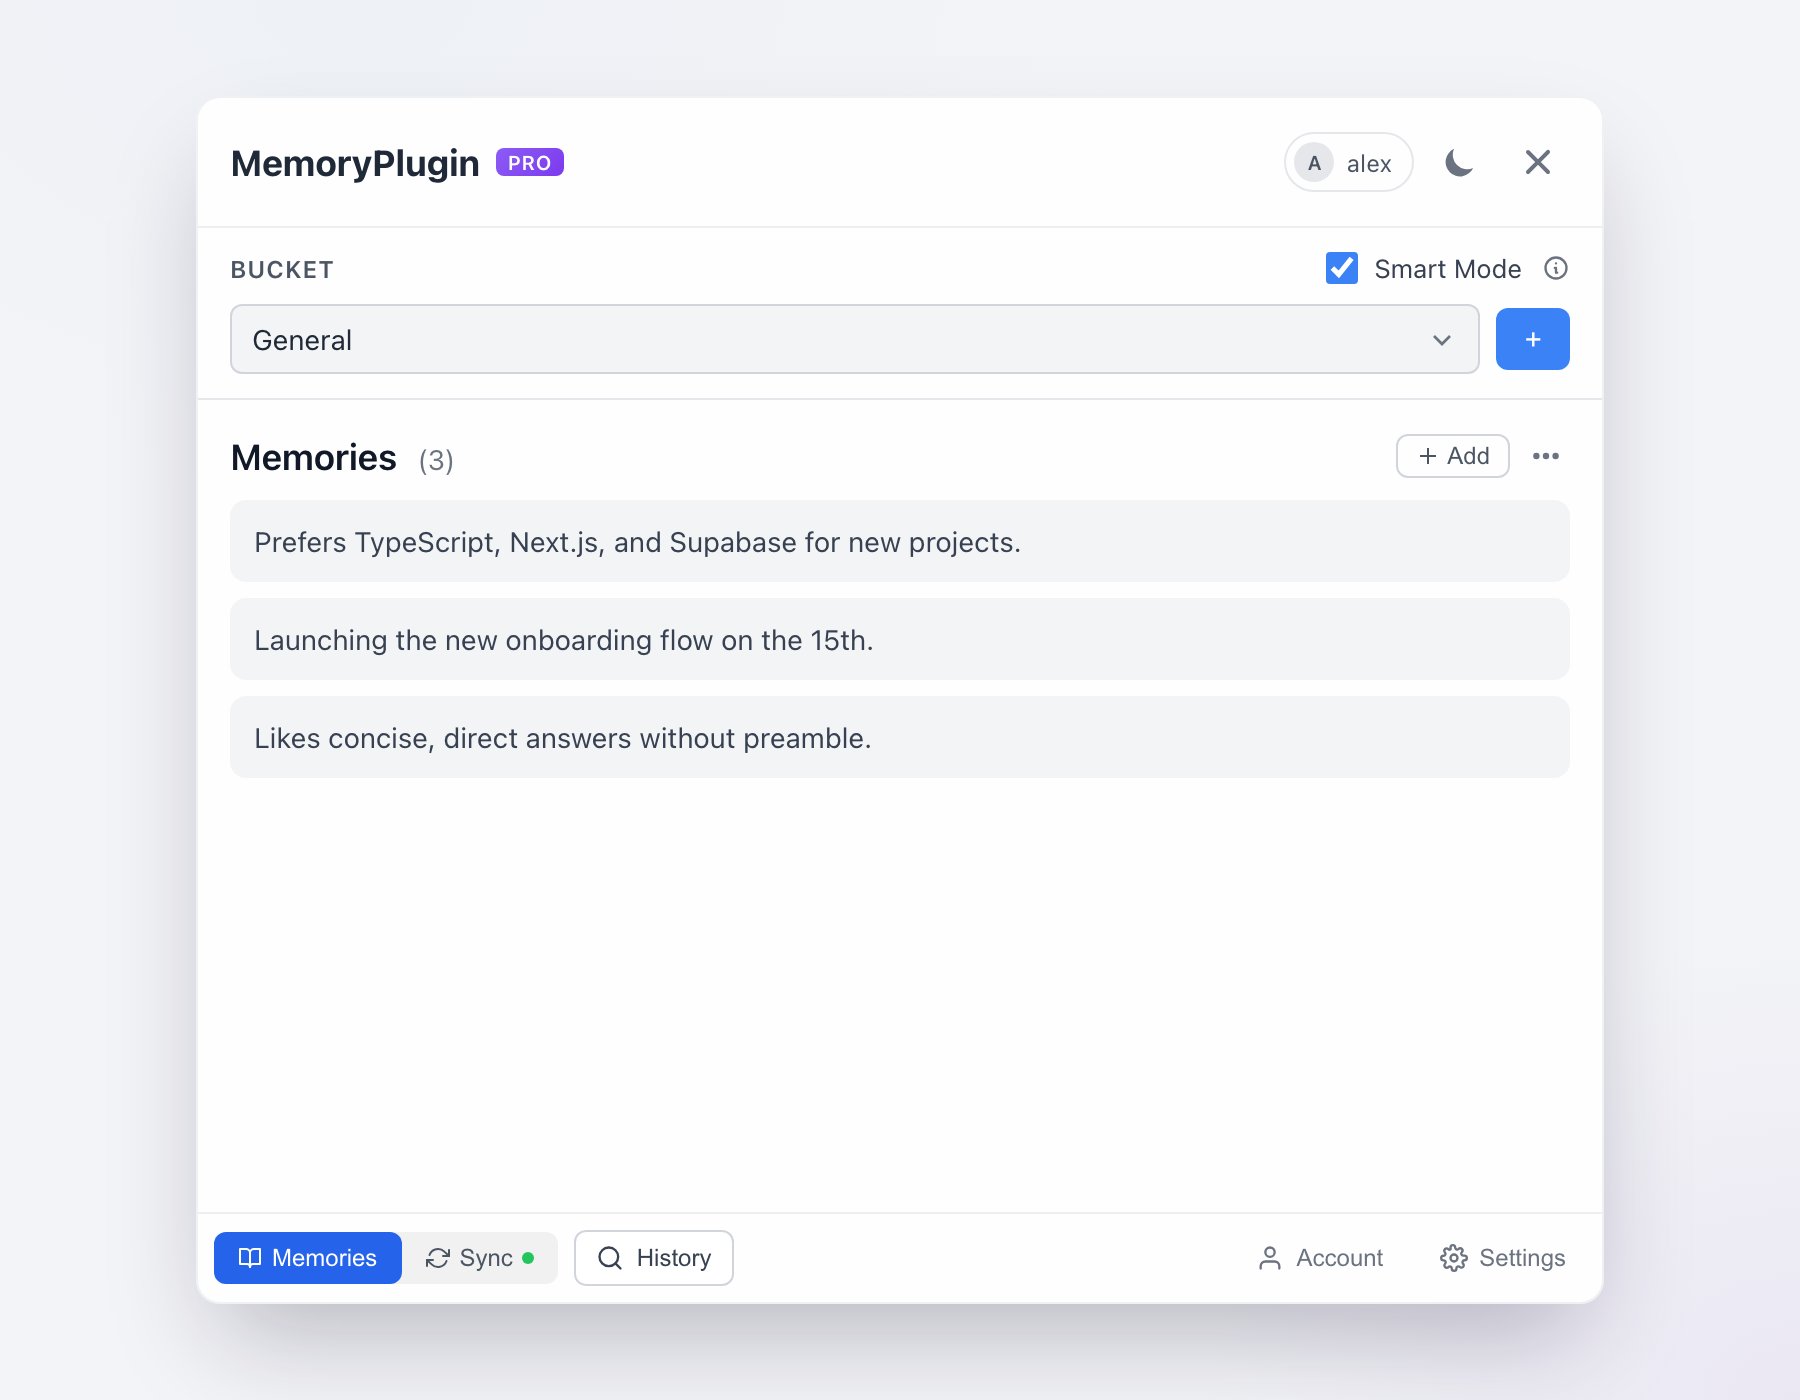
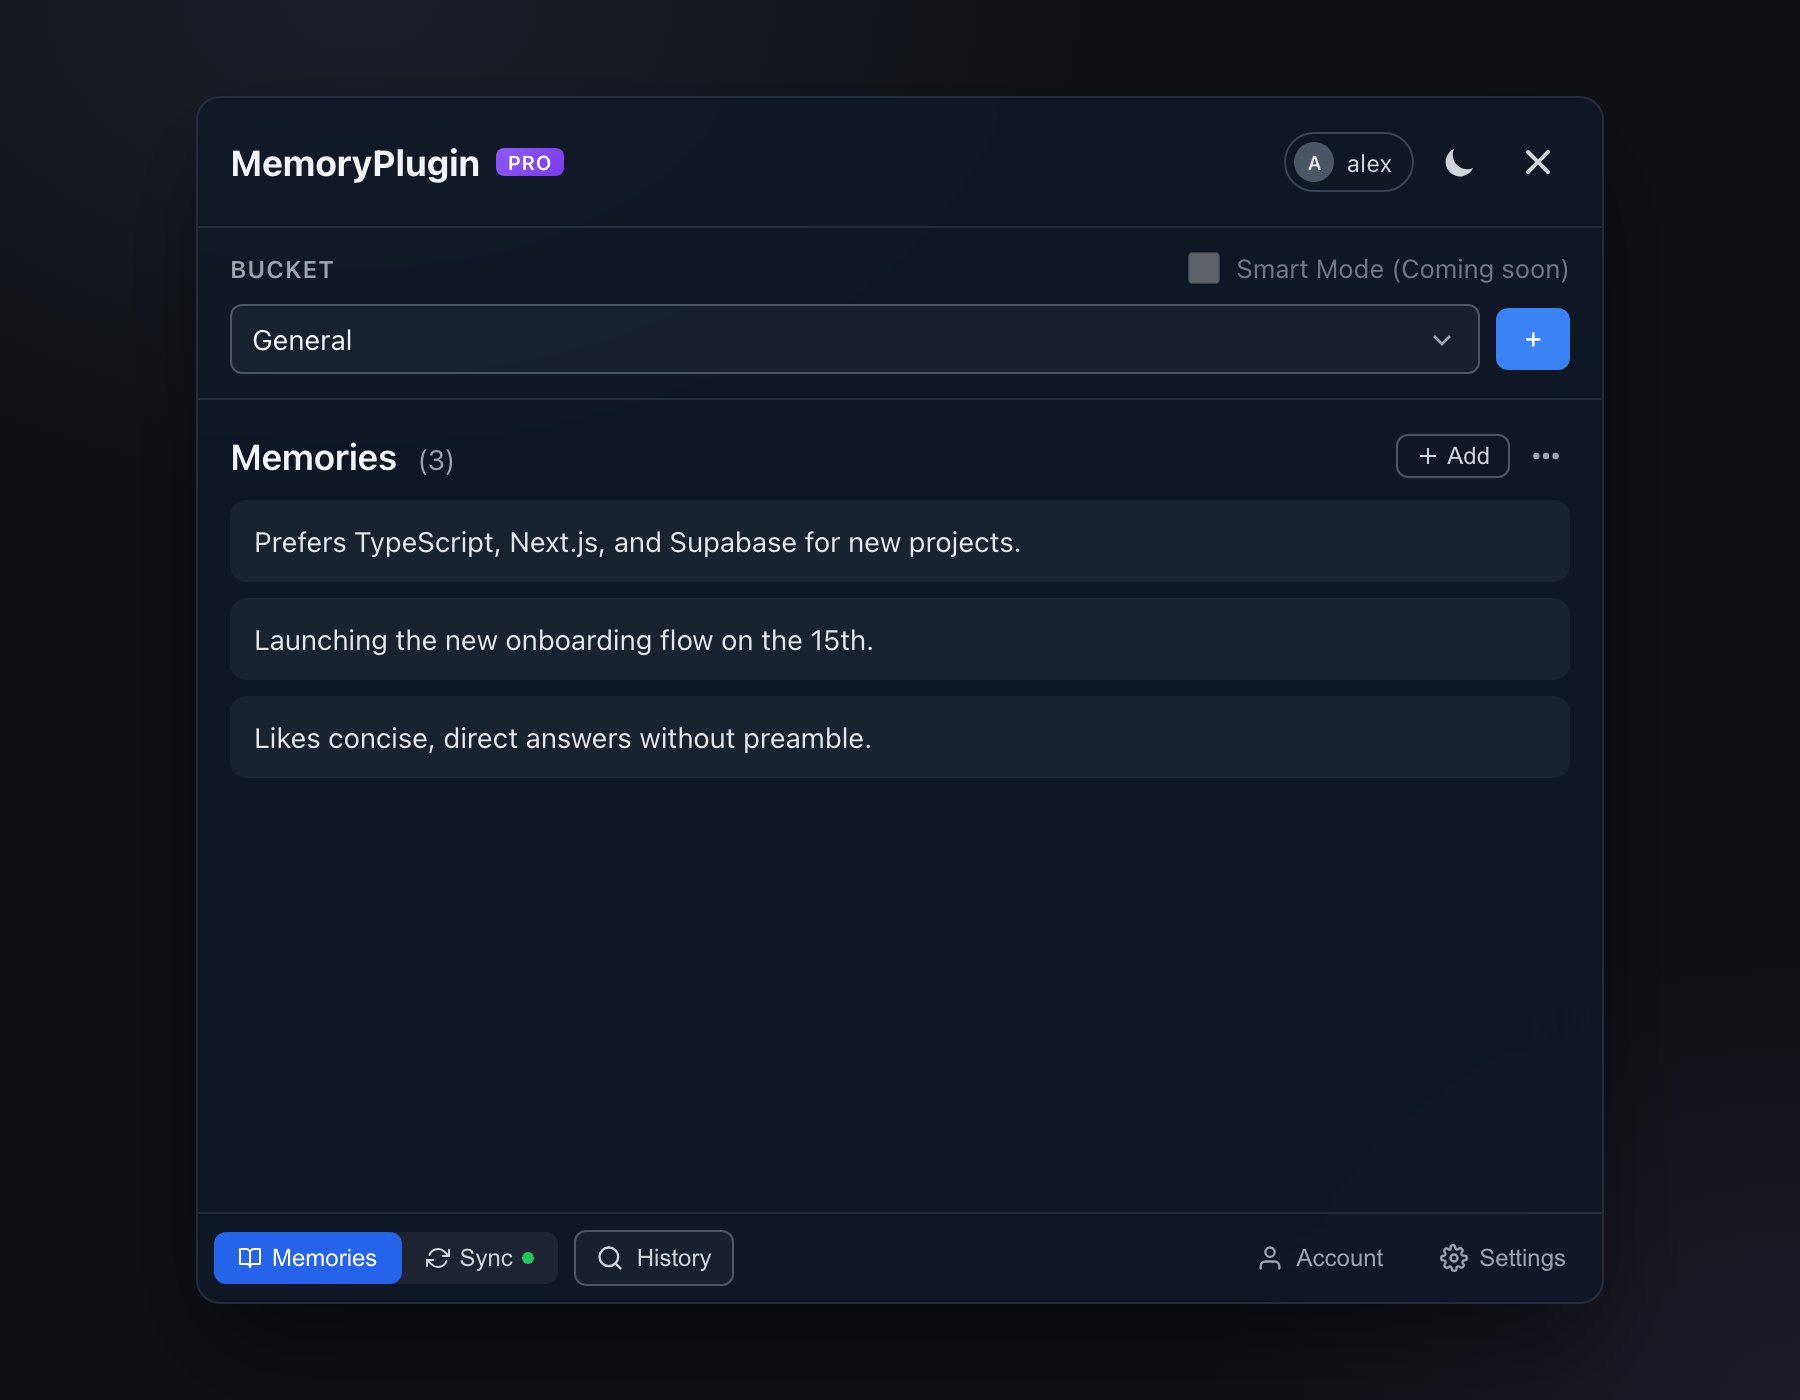
The MemoryPlugin panel: bucket row, your memories, and the tab bar (Memories, Sync, History, Account, Settings) along the bottom.
- Memories - view, add, edit, and delete memories in the selected bucket.
- Sync - background sync of your chat history (only when Chat History is enabled; a
!badge appears when more than 100 chats are unsynced). - History - open the Chat History search modal (also
Cmd+Shift+K/Ctrl+Shift+K). - Account - your plan, stat tiles (Memories, Buckets, Chats, Messages), and links to the dashboard and help.
- Settings - recall, auto-add, load limits, sync toggles, and the onboarding tour.
Memories tab
The Memories tab lists the memories in your selected bucket. Use Add to write one by hand, or the overflow menu for Refresh memories, Copy memories, Export chat, and Load limit. Each memory has inline edit and delete. When a bucket is empty you get a prompt to add your first memory or let the AI save them automatically as you chat.Buckets
Buckets are separate contexts for your memories. Switch buckets with the dropdown before you inject, so the AI gets the right context for the conversation. Every account starts with a General bucket; create more from the dashboard for work, projects, or anything else you want to keep apart. See Memory Buckets for the full model.Injecting Memories
Activating a chat pastes two things into the composer:- Your memories from the chosen bucket.
- Instructions telling the AI what MemoryPlugin is and how to save new memories.
- Quick inject button - a compact button inline in the composer where the platform’s layout allows it. Its tooltip reads “Inject Memories from chosen Bucket”.
- Add Memories pill - on platforms where the inline button doesn’t fit, a glass Add Memories pill appears above the floating MemoryPlugin button instead.
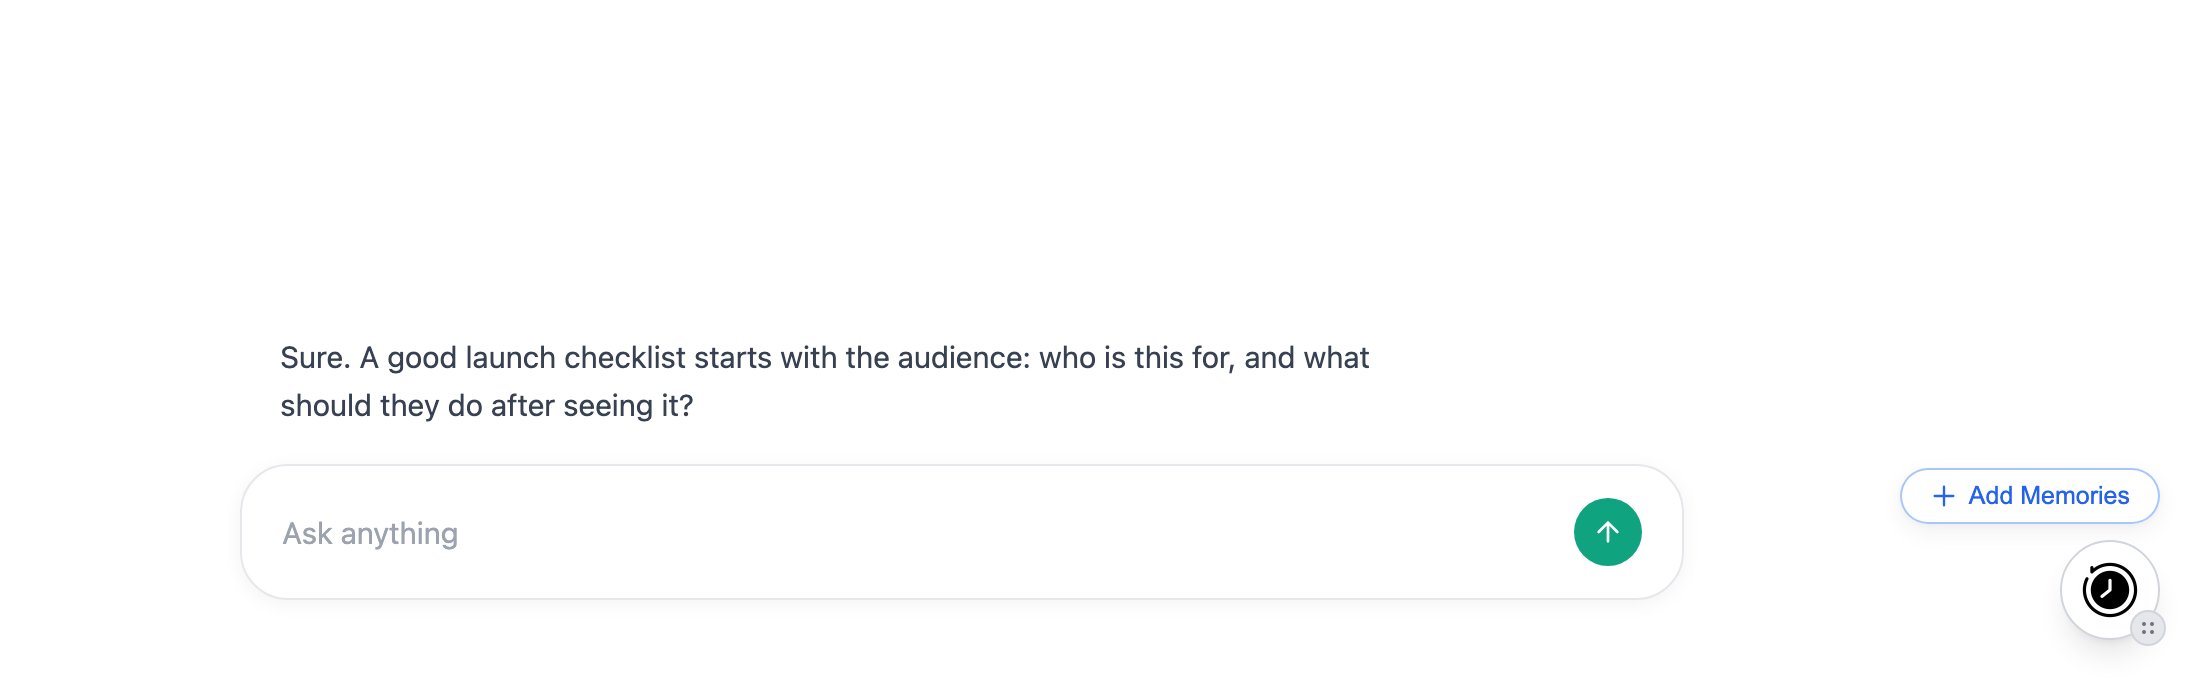
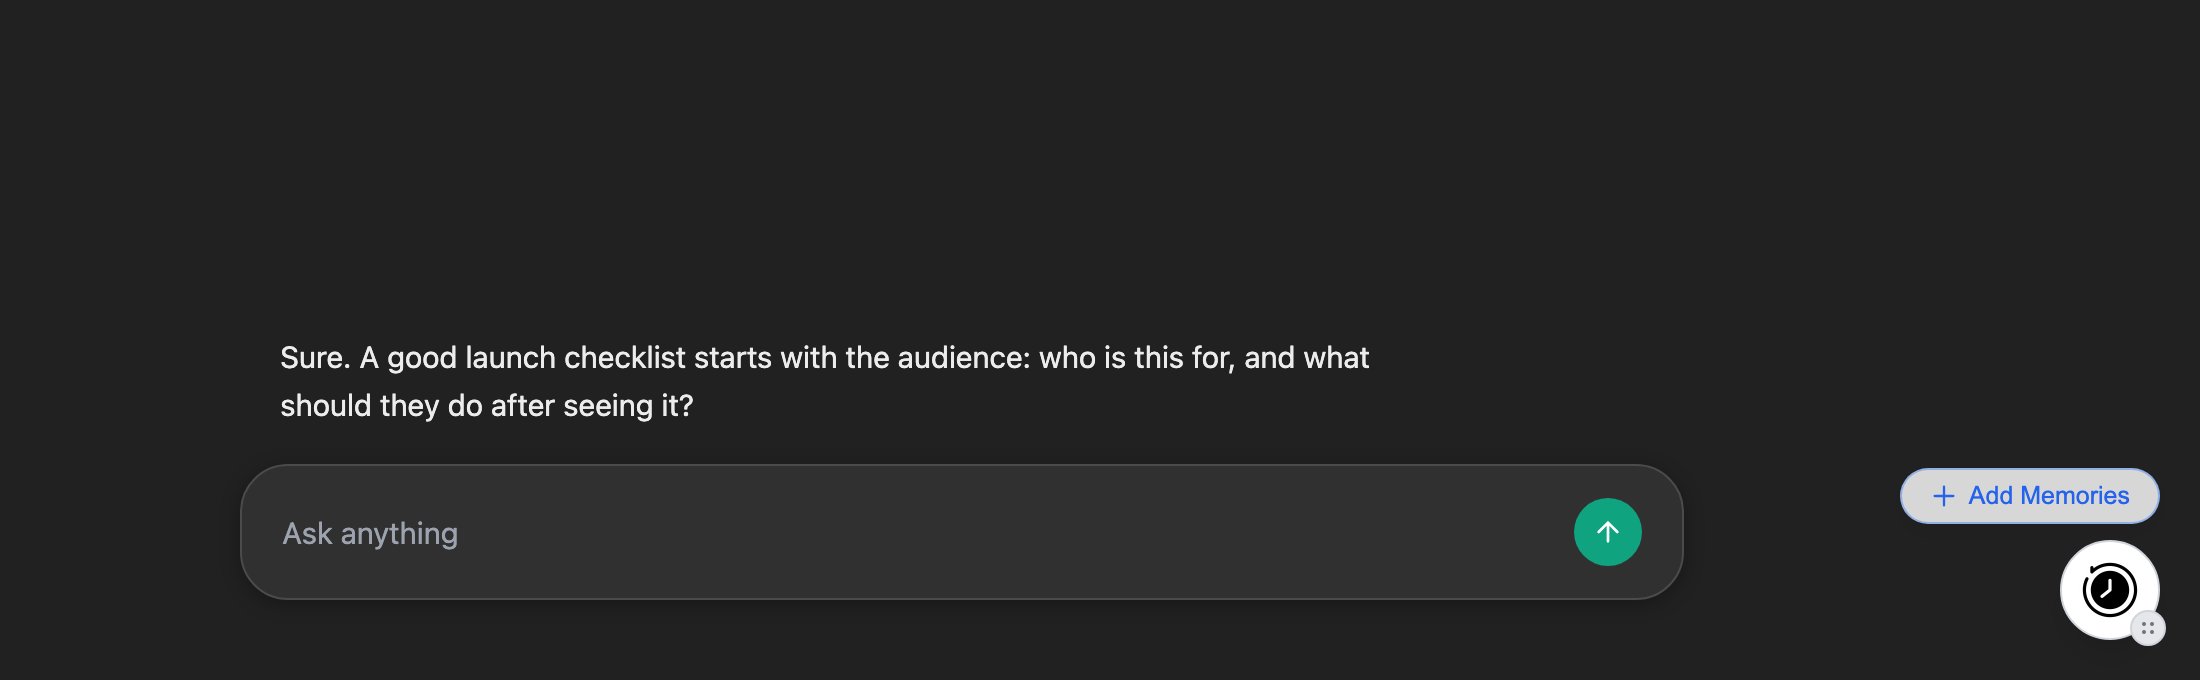
The Add Memories pill sits above the floating button when the inline control doesn't fit.
Auto-Inject in New Chats
Turn on Automatically add memories in new conversations in Settings to skip the manual step. When you send your first message in a new chat, the extension shows an Auto-injecting memories prompt with a 5-second countdown and a Cancel button, then injects. Cancel if you do not want memories in that conversation.Adding New Memories
Once a chat is active, the AI is told to save memories by emitting a marker line that the extension watches for:tool=memoryplugin&&memory=... instead. The AI adds a memory in one of two cases:
- Automatic - it decides something is worth remembering long term.
- Manual - you explicitly ask it to remember something.
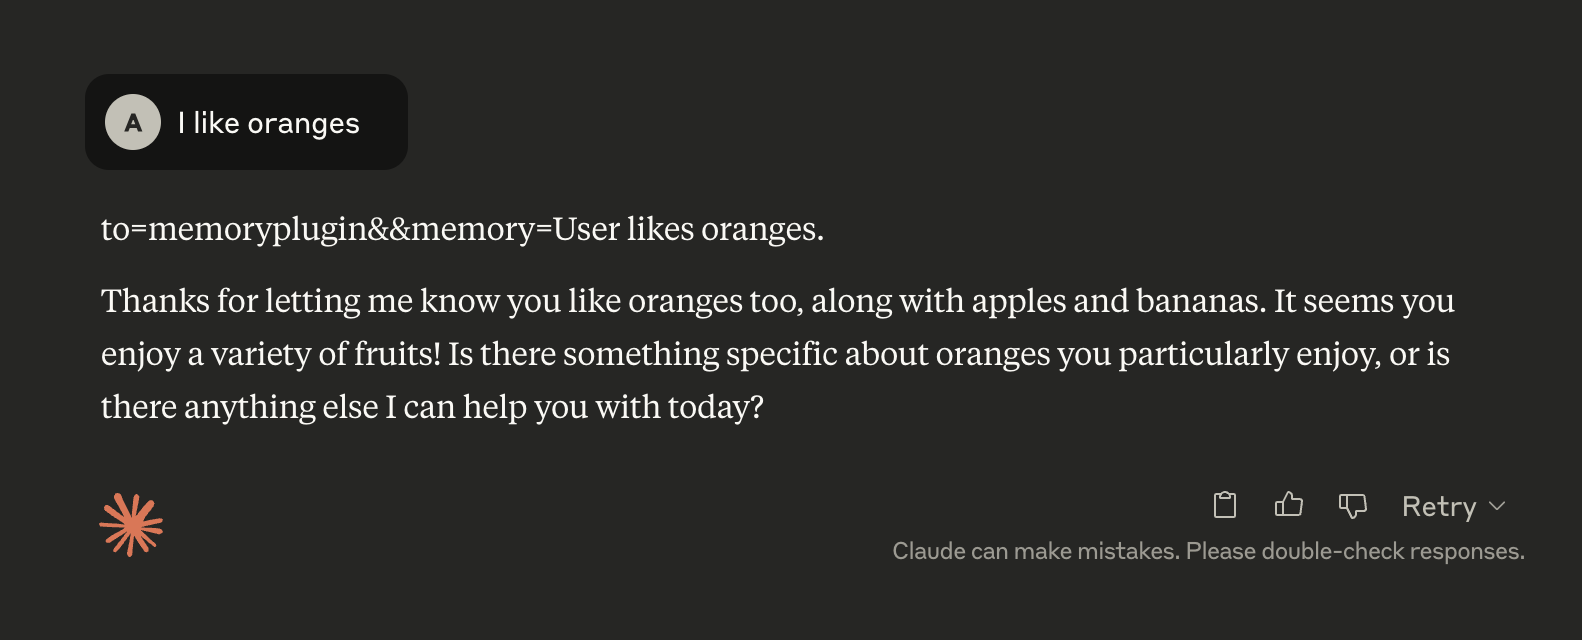
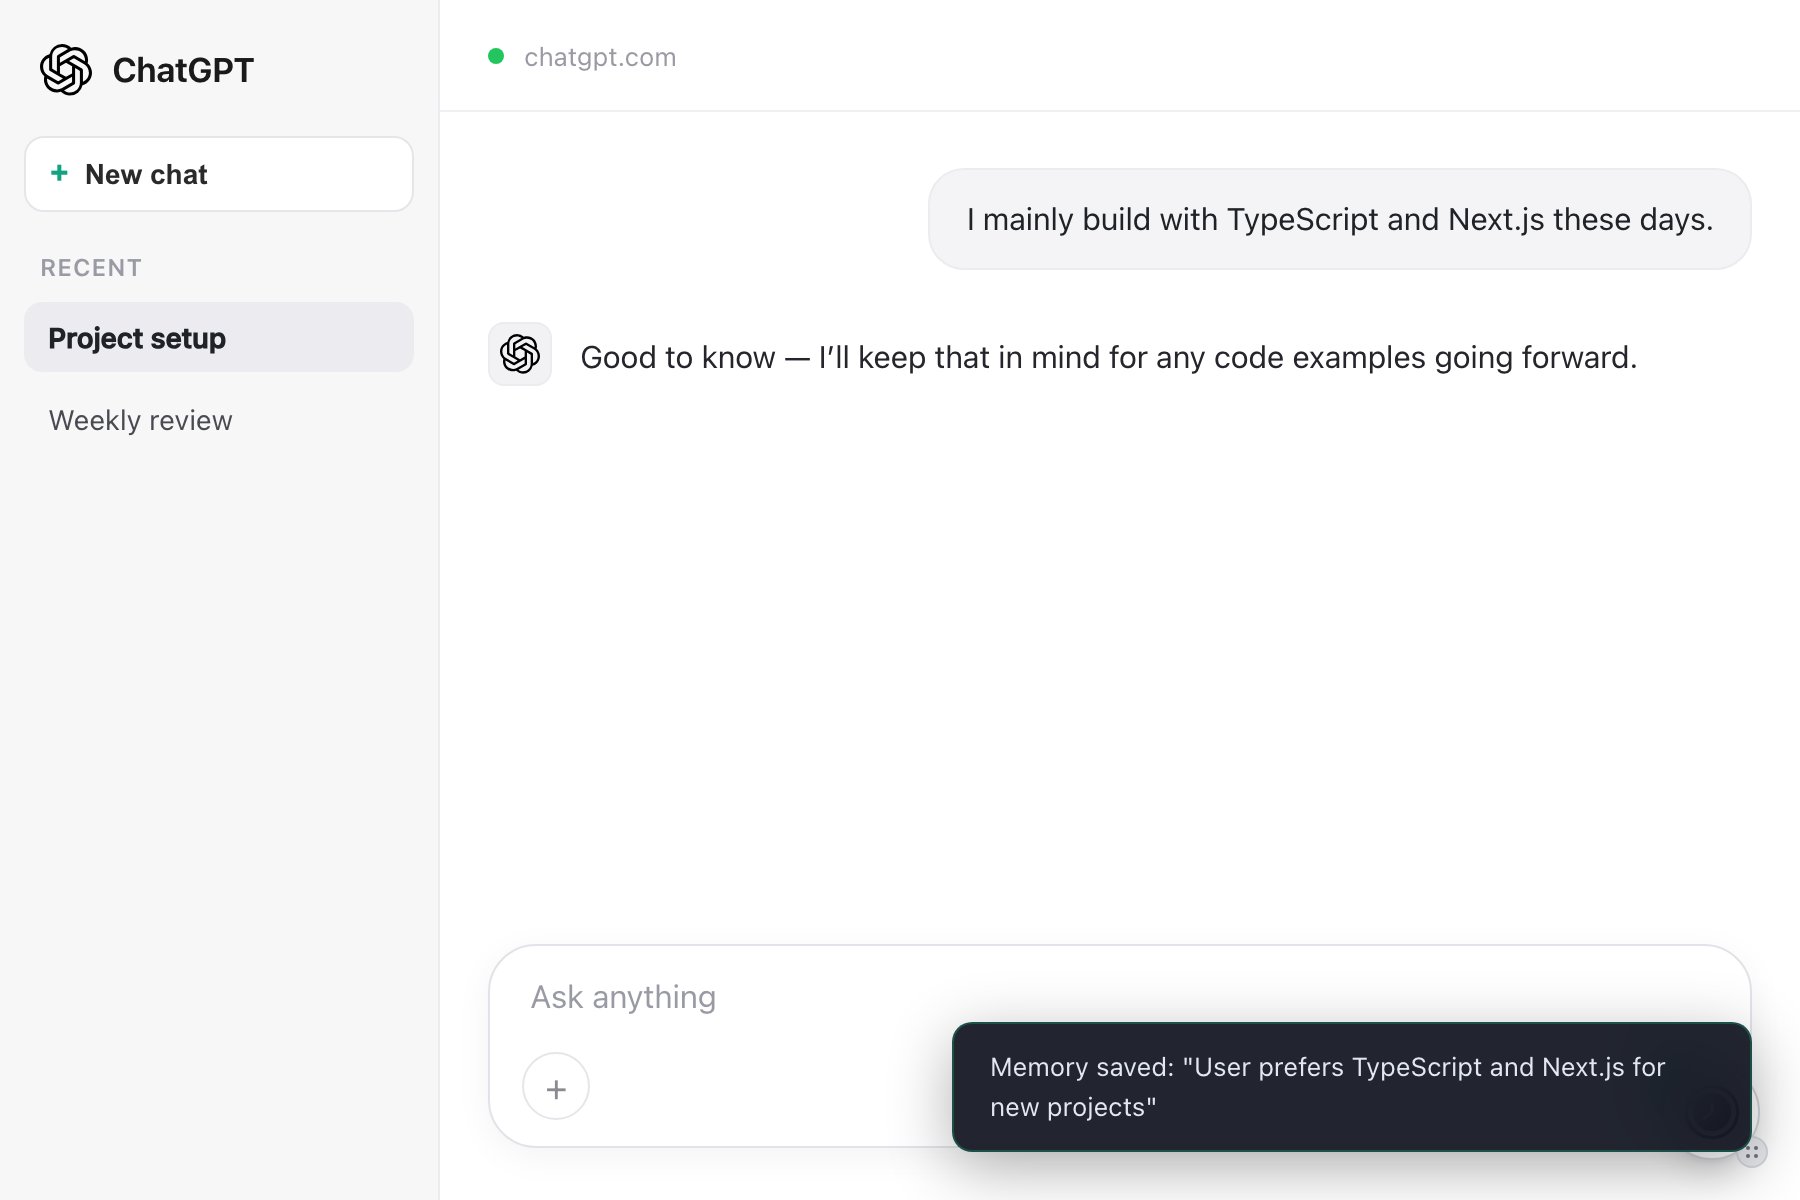
The confirmation toast the extension shows after saving a memory.
Save a highlight with “Extract memory”
You do not have to wait for the AI to save something. Select at least 3 characters of text anywhere in a chat and a floating Extract memory pill appears. Click it, the label changes to Extracting…, and a toast confirms Memory saved: ”…”. It is the fastest way to keep a specific line from a conversation.Smart Memory
Smart Memory keeps token use down and the AI focused by organizing a bucket into categories and loading only what a conversation needs.How it works
- Automatic categorization - it analyzes the memories in a bucket and groups them into a handful of categories.
- Category summaries - each category gets a short summary the AI can see at a glance.
- On-demand loading - full category detail is loaded only when it is relevant to what you are discussing.
- Token efficiency - the AI is not handed every memory on every message.
Turning it on
- Select a specific bucket. Smart Memory does not apply to All Memories.
- Enable it once for that bucket (via the Smart Mode toggle in the panel, or in the dashboard).
- New memories are assigned to categories automatically from then on.
<memoryplugin command="load_category" category="[id]" reason="[why]" /> and <memoryplugin command="add_memory">[what to remember]</memoryplugin>. Smart Memory is included on the Core plan.
Chat History
Beyond memories, the extension can bring your past conversations into a chat and keep your history synced.Recall in a chat
With Chat History Recall on (Settings), the AI can pull concise, relevant details from your past chats when it needs them. It decides when to search and writes its own queries. Before sending, you may see an Add chat history context? prompt with Add / Skip this chat / Cancel. To skip recall for a single message, include#nohistory anywhere in that message.
Sync tab
The Sync tab captures new conversations directly from the platform you are on, so no file export is needed. Supported sync platforms:- ChatGPT
- Claude
- Gemini (experimental)
- Grok
- DeepSeek
- TypingMind
Gemini sync is experimental. Gemini can change without warning, so this integration may break; contact support if you hit a problem. For large backlogs, uploading an export from the dashboard is faster than syncing chat by chat. See Chat History.
Search your history (Cmd+Shift+K)
PressCmd+Shift+K (Ctrl+Shift+K on Windows and Linux), or use the History tab, to open the Chat History modal without leaving the page. Search across your synced conversations, filter by provider (Claude, ChatGPT, Gemini, Grok, DeepSeek, TypingMind) or Starred, open a conversation, copy its transcript, or jump to the original. Each conversation can also generate an AI summary or extract specifics (Key decisions, Action items, Ruled-out ideas, Style rules, Technical specs).
Import Your ChatGPT Memories
The extension can copy the memories ChatGPT has saved about you into MemoryPlugin in one click. The full walkthrough lives on its own page:Import from ChatGPT memory
Step-by-step guide to importing your ChatGPT memories
Settings
Open the Settings tab in the panel to control extension behavior:- Chat History Recall - let the AI recall context from past conversations when it needs it.
- Automatically add memories in new conversations - inject on your first message in a new chat, after a 5-second countdown you can cancel.
- Maximum memories to load -
25,50,100,150, or200. Lower values load faster. - Background Sync - per-platform auto-sync toggles (Auto-sync ChatGPT, Claude, Gemini, Grok, DeepSeek, and TypingMind conversations), plus a View Sync Status & History button.
- How MemoryPlugin Works - reopen the onboarding tour.
Onboarding
On first install the extension opens an interactive tour, Essentials, with four short chapters: what MemoryPlugin is, activating the plugin, saving memories, and chat history and sync. You can skip it, and reopen it any time from Settings via How MemoryPlugin Works.Supported Platforms
The extension injects into 21+ AI sites, including:ChatGPT
chatgpt.com
Claude
claude.ai
Gemini
gemini.google.com
Grok
grok.com
DeepSeek
chat.deepseek.com
Perplexity
perplexity.ai
TypingMind
typingmind.com
Mistral
chat.mistral.ai
Kimi
kimi.com
Qwen
chat.qwen.ai
Z.ai
chat.z.ai
OpenRouter
openrouter.ai
Poe
poe.com
Google AI Studio
aistudio.google.com
NotebookLM
notebooklm.google.com
LibreChat
Self-hosted instances
ChatLLM
apps.abacus.ai
MiniMax
MiniMax Chat
Privacy & Security
Your memories are stored on MemoryPlugin servers and are only accessible to you when logged in.
- You stay in control - memories are added only when you activate a chat, turn on auto-add, or extract a highlight yourself.
- Encrypted transmission - all data moves over HTTPS.
- Authentication - access requires you to be logged in.
- Bucket isolation - memories stay separated by bucket for different contexts.
Permissions
The extension needs a few browser permissions to work:- Storage - cache your authentication and preferences.
- Host access - inject the panel into supported AI sites.
- Cookies - keep your login session.
Troubleshooting
Memories not loading
Memories not loading
Check that you are signed in to your MemoryPlugin account and have a working connection.
Sync not working
Sync not working
The Sync tab needs you signed in to both MemoryPlugin and the source platform. If you see “You might not be logged in”, open that platform in a new tab, sign in, then come back and refresh.
Extension permissions
Extension permissions
Confirm the extension is allowed to run on the AI sites you use.
Memory not being added
Memory not being added
The AI’s response has to contain the marker
to=memoryplugin&&memory=[text] (or tool=memoryplugin&&memory=... on ChatGPT). Ask it again to remember the item if it did not.Canvas mode issues
Canvas mode issues
The extension adapts to ChatGPT’s Canvas mode. Refresh if the buttons do not appear correctly.
Next Steps
Organize with Buckets
Learn how to organize your memories into different contexts
Try MCP Server
Use MemoryPlugin with desktop AI applications